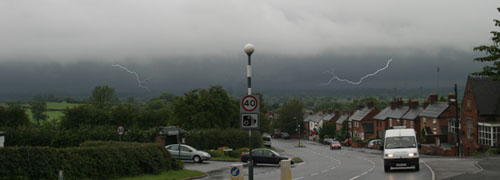
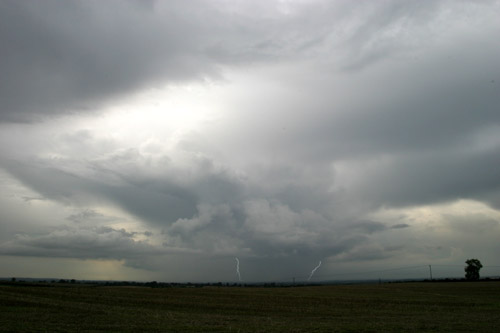
 |
|
Tips on Lightning Photography. |
|
Our Site Home Live Local Weather Lightning
Data Archives This Year Weather Images Burton on Trent - Floods Gust Cloud & Data Lightning 26/07/2006 Lightning 12/08/2004 Lightning Images Shelf Cloud & Data Sun Pillar Tornado - 23/08/2004 Space Photographs Comet
Machholz Useful Stuff Storm
Chasing Miscellaneous
|
Photographing lightning is tough, you soon learn that you can waste a lot of film. However since the introduction of digital cameras taking pictures of lightning has become easier on the pocket, however, its no easier to get images of lightning. Getting the exposure right is the hardest part, its very much trial and error. Keep notes of the settings, this saves you from having to remember the next time round. Good equipment can make you life much easier. Equipment:
My Setup:
Dark Sky LightningThe simplest form of lightning photography is done with a dark sky. Find a part of the sky where lightning is happening, aim your camera that way, focus on infinity, set the f-stop, open the shutter with the cable release, and close the shutter after lightning happens. In simple, open the shutter and after a few lightning
discharges you close the shutter, advance the film, and shoot
again. In most cases, one vivid cloud-to-ground (CG) strike is sufficient. When the sky is dark, there is no limit to how long you can wait with the shutter open ... although you may get some "strobing" (see below). Artificial LightsThere may be some lights somewhere in your view. You may or may not wish them to be there, but unless they are spotlights (or car headlights) aimed into your lens, you can do long exposures (on the order of a several minutes) without having them ruin the photograph. Your first job is to obtain proper exposure of the lightning. If the flash channel is visible, the most attractive photographs (in my opinion) show a lot of branching, so if you want such pictures to be exposed so as to reveal as much branching as possible. This makes it possible for artificial lights to become intrusive. Assuming you don't want artificial lights to intrude noticeably in your image, having them in view limits the length of time you can wait for a flash with the shutter open. Even bright moonlight can be a problem if you have lengthy time exposures, as illuminated clouds will move (and, therefore, blur) during the time your shutter is open, when you hold it open long enough. Of course, you might want such blurring in your images ... the choice is up to you, as the photographer. If the lightning is happening inside the cloud (intra-cloud, or "IC" flashes), illuminating it from within, such lightning can be attractive but it is not as bright as flashes showing the channel, so you'll have to give it more exposure (a smaller f-stop, equivalent to a wider lens aperture); probably on the order of a full stop of additional exposure, compared to shots done with a visible, bright lightning flash channel. The "Strobe Effect"On very long exposures, with lots of intra cloud flashes, the clouds may move visibly in the frame, giving a sort of "strobe" effect. This may or may not be pleasing to you. If you don't want the strobe effect, limit your exposure times by closing the shutter after a relatively short exposure, advancing the film, and trying again. Film Choices and ExposureDigital cameras are not a problem when it comes
to choosing film, just make sure you have lots of memory to soak
up all the images you will be taking. Exposing a 100 or so images
will not take long at all, I have storage for around 1000 images.
Digital Settings. ISO 100, f4/4.5With film cameras one thing is almost certain: you will use a lot of film attempting to get good lightning photographs! Until you become familiar with the process through experience, plan on having fewer than 20% of your exposures having any lightning in them. Film is cheap and so is developing, but the cost can still add up. As you gain experience, you will get better at estimating the exposure from the situation. Use a good branded film for lightning work. Exposure.. a starting point for exposure is in the f4-f5.6 range. Not all flashes are the same brightness and you will always be in the position of having to guess what exposure to use. Given all the factors that influence the process (distance, brightness of the flash, film speed, exposure time, etc.), it is difficult to be definitive. For lightning that is farther away, more exposure is needed ... if it's very close, less exposure is called for to get the right image. There are no hard and fast rules, so experience is going to be your best guide. NOTE: if you use filters, especially polarisers, either remember to remove them before starting your lightning photography, or be sure to account for them when you estimate your exposure setting. Telephoto LensesLonger lenses will help "frame" distant lightning, but remember
the following things when you use those longer lenses:
"Staccato" FlashesThe visible part of a typical lightning flash runs down the lightning channel one or more times. Flashes that illuminate the channel only once are often called "staccato" flashes They tend to be visibly bright and brief, often leaving a vivid afterimage in a dark-adjusted eye. These photograph quite well, typically revealing a lot of branching. Multiple flashes along the same channel usually do not reveal as much branching, apparently because the second and later flashes run mostly down the main channel and do not re-illuminate the branches. Hence, staccato flashes are more photogenic, in general, at least in my opinion. You have to be very lucky to catch a staccato flash in the daytime.
The Right Place at the Right TimeA way to pick the right part of the sky, but with no guarantees, is to observe the lightning for a while without attempting to photograph it. new flashes to ground near a developing shaft of precipitation often are followed by several more in about the same area. As a storm dissipates, lightning activity shifts into its anvil, with streamers flashing sporadically (not frequently) through the anvil. In general, it is easier to capture frequent lightning than occasional flashes; the latter often do not seem to follow any simple pattern that enables you to anticipate where the next flash might be. Daytime LightningOnce you get to the point where you can get 80% "keepers" from your dark sky shots, you might want to advance to the much more challenging daytime lightning (i.e., lightning shots while there is still light in the sky). The idea is to get both the lightning and the surround scene properly exposed. It's more fun (i.e., challenging) and the images can be quite dramatic, but can consume huge quantities of film quickly ... your success rate can be pretty low. There are several ways to obtain a shot that is properly exposed for the existing, ambient light and the lightning.
The way method #2 works is this: meter the image (without lightning) at, say, a one second exposure time. From this, you obtain an f-stop value that will give a proper exposure. You can increase the length of time your lens is open by taking advantage of the reciprocity rule ... each time you stop down the lens (reduce the aperture) one full f-stop, you increase the exposure time by a factor of 2 and keep the same exposure. Thus, suppose your one-second metering gives you a reading of f4. Stopping down to f5.6 will mean you can expose for two-seconds, f8 means a four-second exposure, f11 gives 8-seconds, f16 gives 16-seconds, and so on. For daytime images, an exposure of more than about 4-seconds gets you into reciprocity failure with most films, so you can expose it for a little more time than the reciprocity rule requires. In the preceding example, a 4-s exposure could go for 6-s, an 8-s exposure could go for 12-s, and a 16-s exposure probably could go for 26-s or perhaps a bit more. Hopefully, this should become clear, with practice. With method #3, you probably can get away with exposure times as short as 1/2 second or so. If need be, you can use a filter to get a proper exposure of the ambient light with these relatively long exposure times. Basically, since the branches are not as bright as the main channel, it is difficult to capture a well-branched lightning channel photograph with much ambient light. What's in Your ViewfinderPicture composition is a matter of personal taste, naturally. Rules are meant to be broken, but there are some things to think about. It is possible in some places of the plains to have lightning appear on a completely featureless horizon; this may or may not be what you want for your lightning images. When aiming at any photographic subject, avoid the tendency to centre the frame on the object of attention; specifically, be attentive to the location of the horizon line in your frame. You are photographing lightning so you might want to push the horizon line well down in your frame In most cases, you want to fill the frame with lightning to the maximum extent possible. Video CameraA video camera can be a way to guarantee images of lightning. There are some down sides to using video though. The kit you need is. Video Camera, Tapes, Tripod, Long life battery and for processing the image, a way to capture a frame from the video tape. My system uses "firewire" to download the image from the video camera to my PC The way you capture lightning images on a video camera could not be simpler. Place the Video camera on a tripod, point it in the direction of the storm and set the zoom so that the camera captures the area you want to film and press record and wait. When you have caught some lightning discharges use you r PC to grab the frames. Some downsides are the images are often smaller that you would like and not as clear as digital or film. |
The layout, design and content of this web-site are the copyright material of Steven J Warren.
Copyright 2009 All rights reserved.
DESIGN - www.FlyingBunnyStudio.com
NOT FOR PROTECTION OF LIFE OR PROPERTY
The information here is provided for general interest.


